Continuing with my series of how-tos on repurposing pen blanks, today we’ll make a sanding block from pen blanks. You can actually make them in any size quite easily, but since this is the pen blank challenge, we’re making “mini” sanding blocks.
Since a lot of my work is creating small wood boxes and objects, a mini sanding block will come in handy to get to all those tight areas that a store-bought one cant.
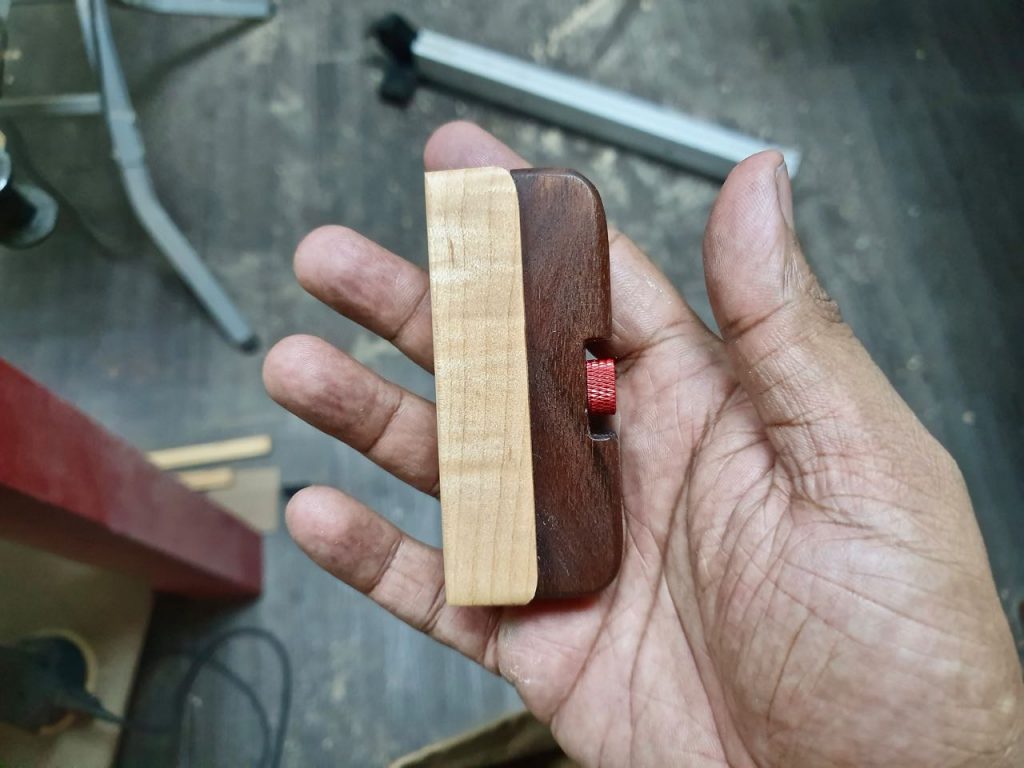
Just Two Pen Blanks and Thumbscrews
You’ll need two pen blanks, preferably in contrasting colours. You’ll need drill bits – Brad Point and Forster bits. Forstner bits are great for creating hols that are almost completely flat at the bottom.
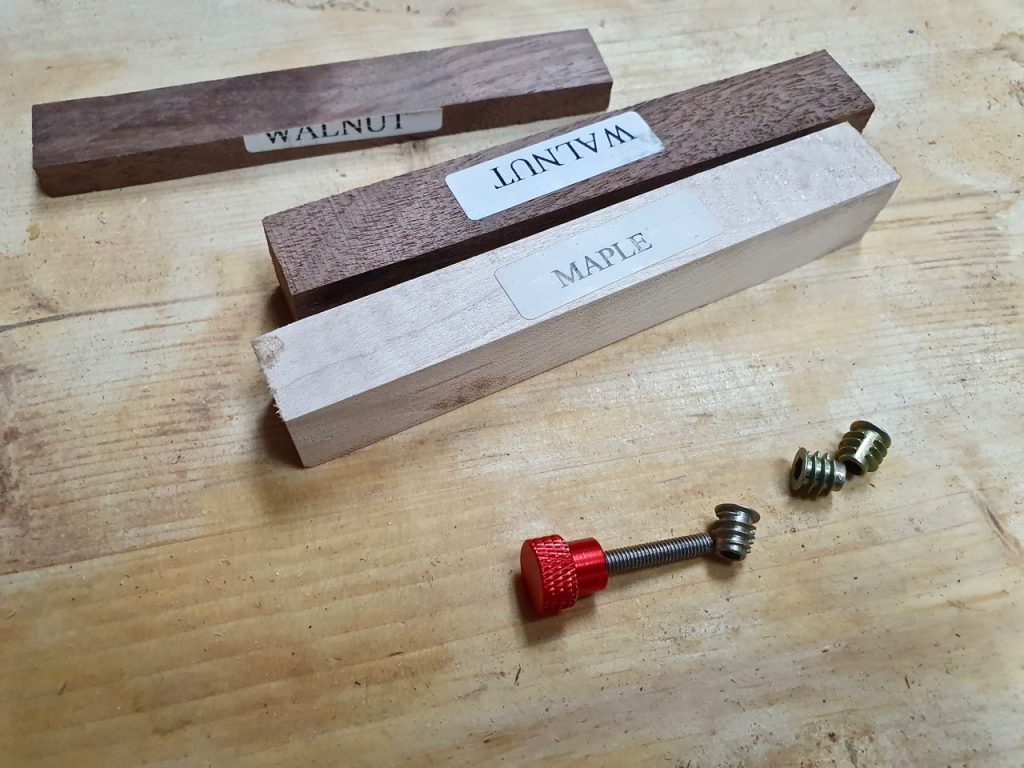
To save money, decide on your thumb screw and threaded inserts. There are just so many variations of cool aluminium thumb screws, I can’t tell you which is the best. Buy a couple of them, they will come in handy when creating workshop jigs. Get some threaded inserts to match.
The aluminium thumbscrew you see above is an M4 thread. I always get metric, it helps me avoid mistakes by when dealing with fractions. I only do fractions when there’s no other choice.
Making The Wood Sanding Block
Most pen blanks are rough cut. Some of them would have also warped over time. True up the pen blanks on the table saw.
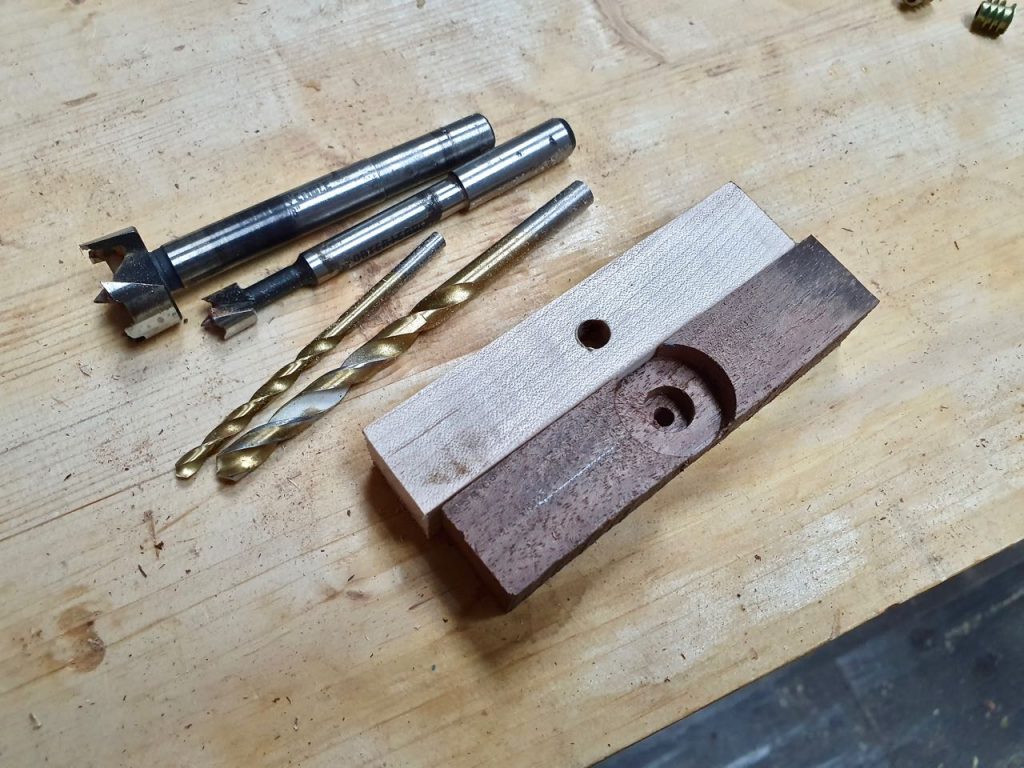
Drill a pilot hole for the screw nut first. It helps if both blanks are exactly the same size. Use some blue tape to keep the two blanks aligned. Then using a Forstner bit, I drilled out a recess for the nut, and a larger recess for tightening the nut.
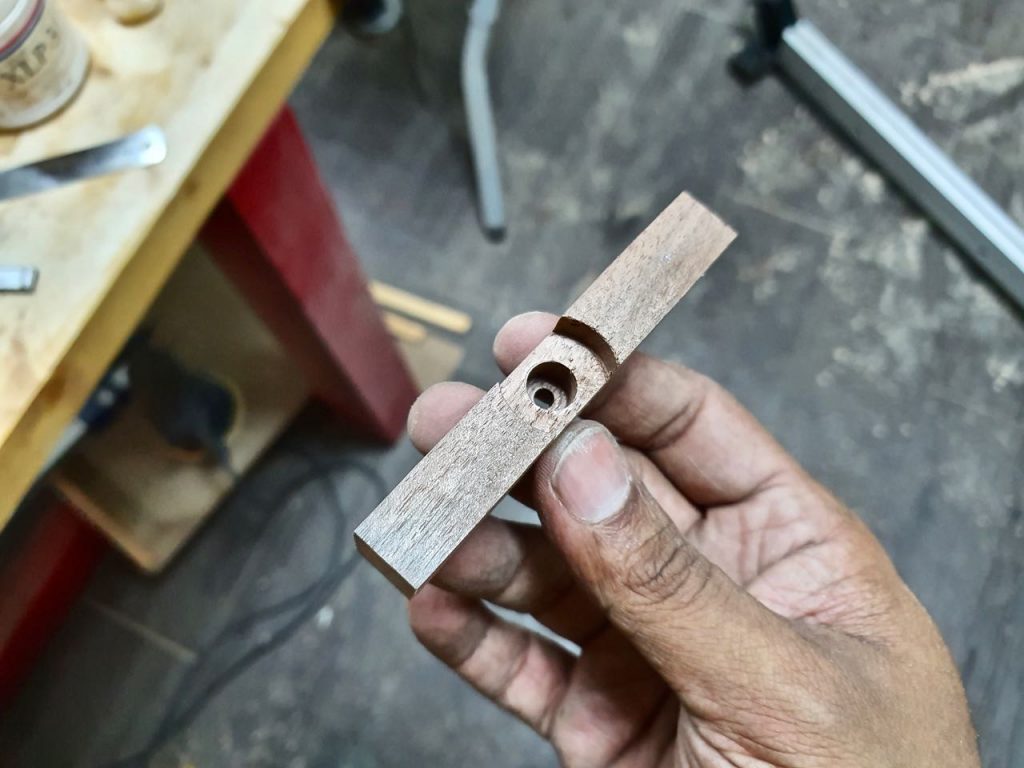
To make sure the sandpaper stays secure in the holder, you’ll need to cut a groove on the bottom blank and trim to top blank to fit into the groove. I did it with my single-blade table saw and cleaned up with a chisel. This doesn’t have to be a tight fit, since you’ll need to consider the thickness of the sandpaper.
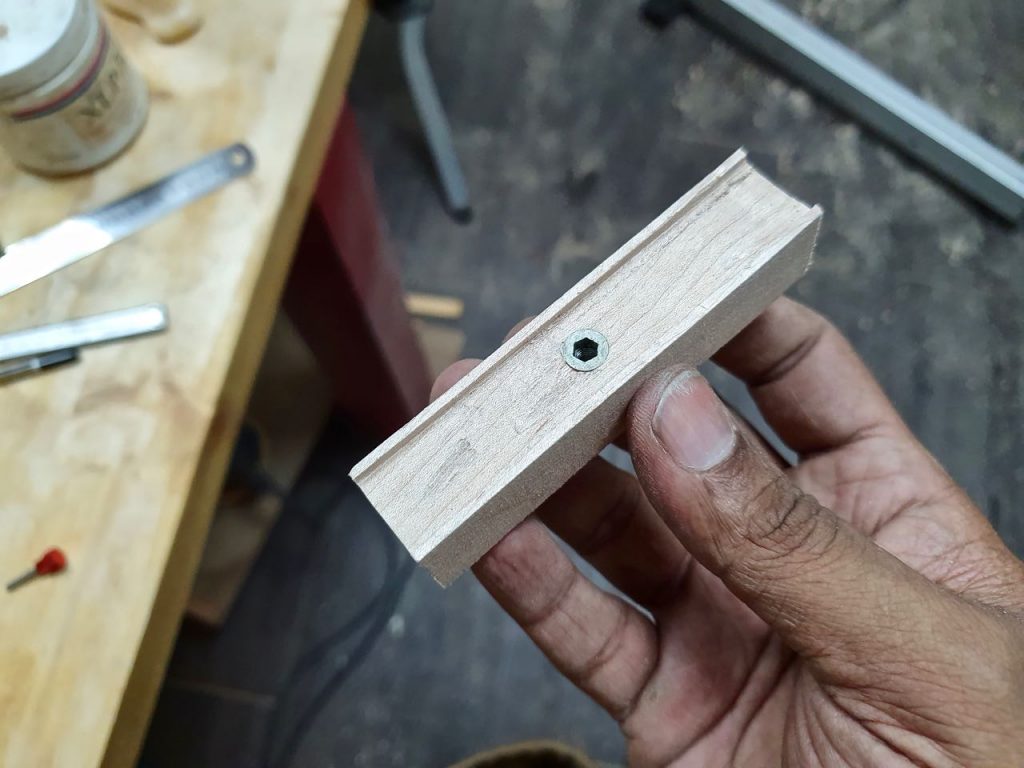
Attach the threads with an Allen wrench. This should not require much force since the hole is only slightly smaller than the diameter of the threads. If you’re finding this hard to do, check the width of your hole.
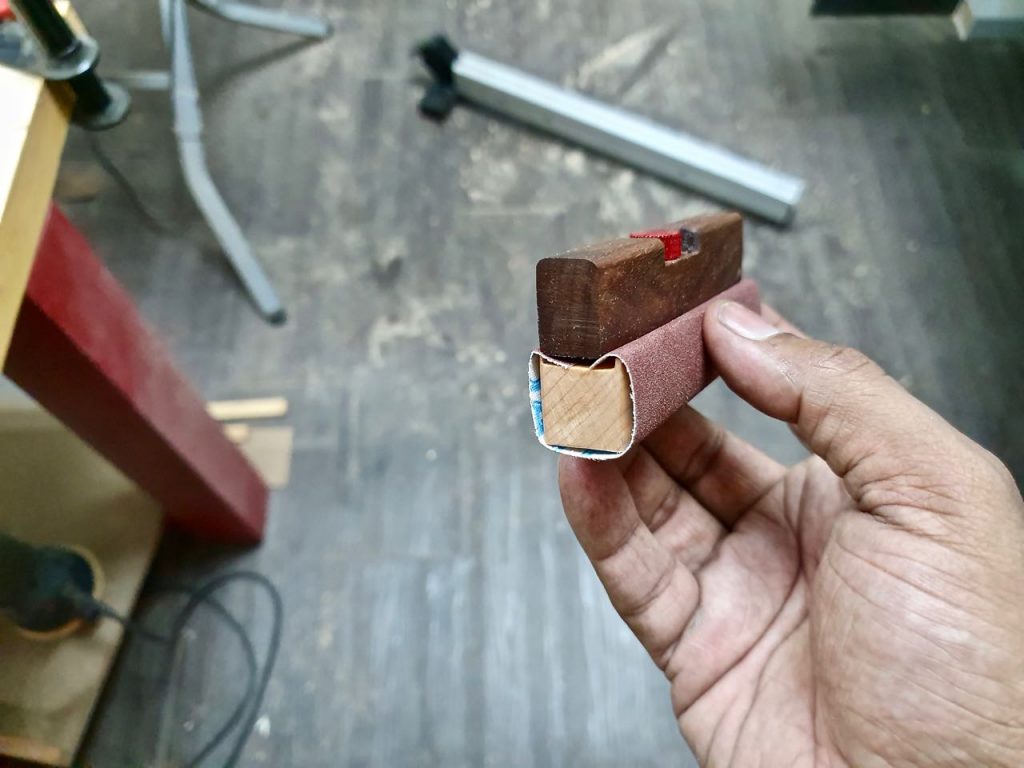
Test fit with your sandpaper and make adjustments where necessary to your sanding block. Cut off a piece of sandpaper, wedge it between the two pieces, and clamp down with the thumbscrew.
I rounded off the sanding block to make it more comfortable to hold. Unfortunately, I kept rounding it off beyond the point of necessity.
The result was a wood sanding block that works just fine, but I feel is too pretty to be actually used as a tool. I might make this a gift to some woodworker someday, or just keep it as a conversational tool.
You might want to avoid being in the same boat as me. A DIY sanding block only has to be functional, not pretty. I might make a new version using the same method, but make it much simpler.
If you like this project, check out the wood coaster or business card holder that I also made with leftover pen blanks.