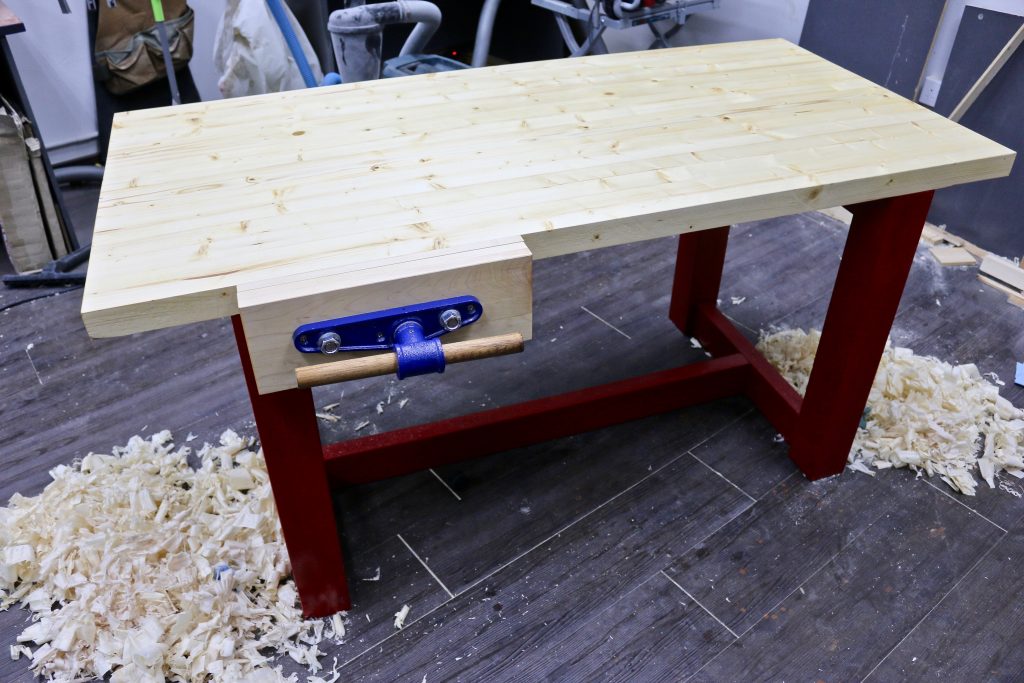
While mounting the 10″ Yost woodworking vise, one of the last two steps was making a wooden vise handle. I believe the process should be the same for other types of woodworking vise, although the measurements may vary.
If you’re been working with a lathe for some time, this should be easy. If you have not, or do not own a lathe, you can still make a wooden vise handle. I’ll show you how.
There are three important steps:
- Getting all your measurements right
- Turning the rod or using a dowel
- Turning the ends and attaching them
I finished making my wooden vise handle in 20 minutes with a lathe. It will take longer if you do not have one, but not much longer.
Get Vise Handle Measurements
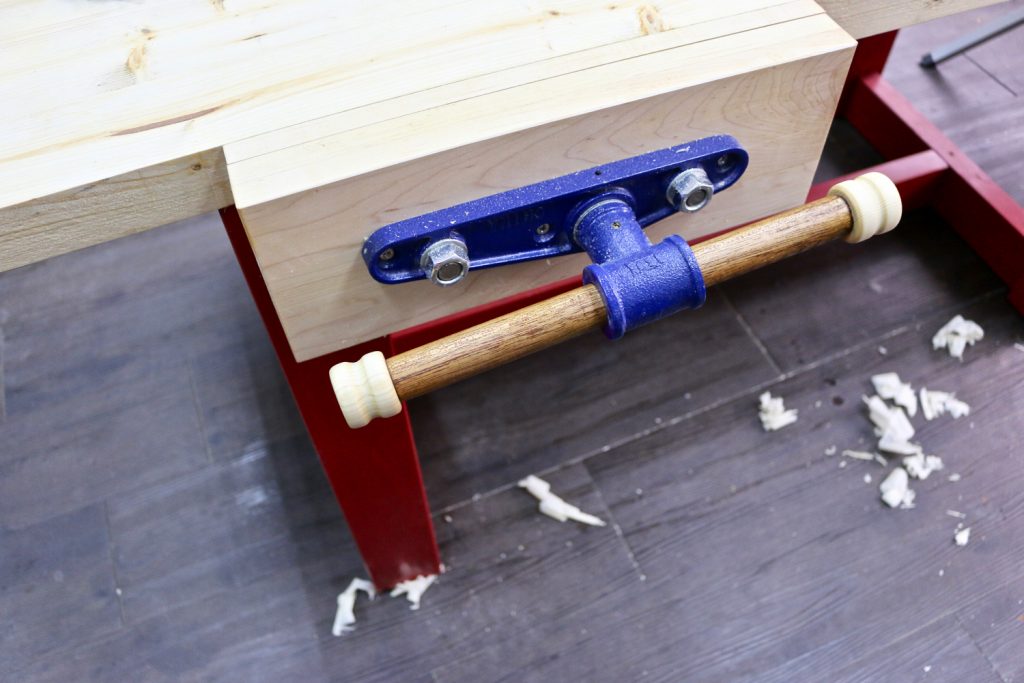
The most important measurement is the diameter of the vise rod. For my Yost 10″ woodworking vise, it was just over 1″. This meant that I should turn the rod to 1″ in diameter, or buy a 1″ dowel.
You should also consider how long the rod should be. This is up to personal preferences, but a slightly longer vise handle makes turning the vise much easier.
The circular momentum created by a longer vise (and heavier end caps) means you need to exert less force. However, a handle that is too long may get in the way of other objects or your work.
Buying a 1″ Wooden Dowel
Although I can turn, I find it so wasteful to use my 3×3″ or 2×2″ inch stock to get a 1″ dowel. You can easily buy a 1″ dowel from Amazon for an affordable price.
You may also want to consider using the wooden handle of a mop or broom, and cut it down to size. Rolling pins (for pastry making) are basically wood dowels in standard sizes like 1″ or 1-1/4″. You can get wood rolling pins for about $9 on Amazon.
There are some many round, long objects you can use instead of turning it. If it is larger than the required diameter, you can sand it down with sandpaper. You can also turn away the access on a wood lathe.
I had a piece of leftover Meranti dowel that fits perfectly as the handle, so that is what I will be using. I test fitted it, and it was just the right size.
Turn or Make The Endcaps from Scrap
The next important step is to make the endcaps for your wooden vise handle. There are different opinions on this, but I recommend just using leftover scraps, even Pine is fine.
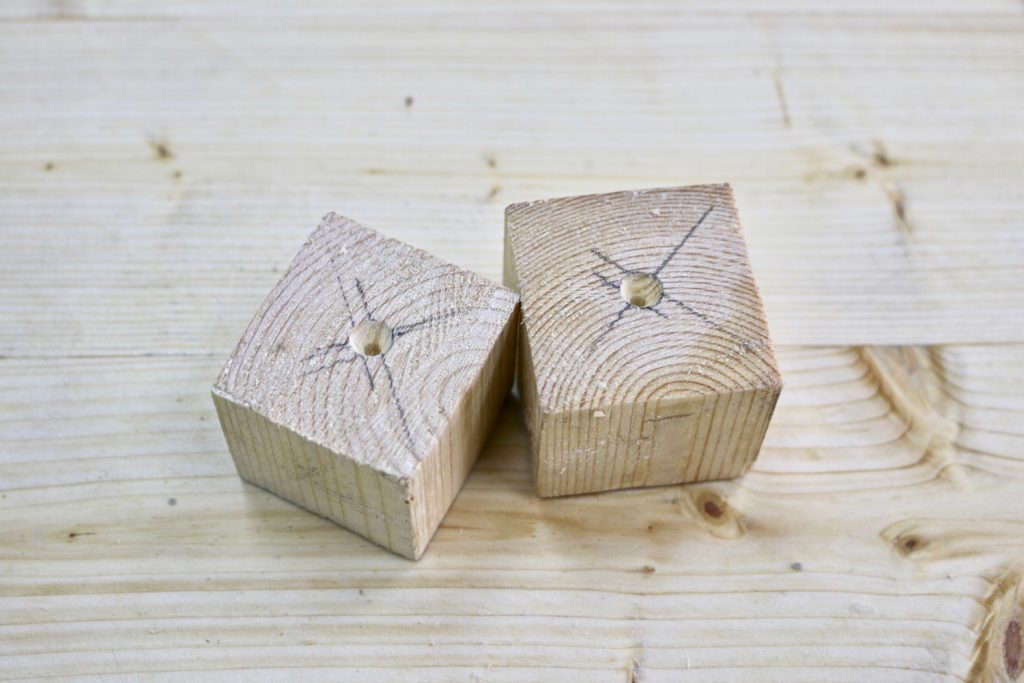
I picked up two equally-sized offcuts, and drilled a 3mm hole through the middle. I then used a center drill bit to make a 60-degree countersink.
(You should drill deeper than what you see in the picture, as most of it will be sanded away. I went back after sanding to add more depth to the hole.)
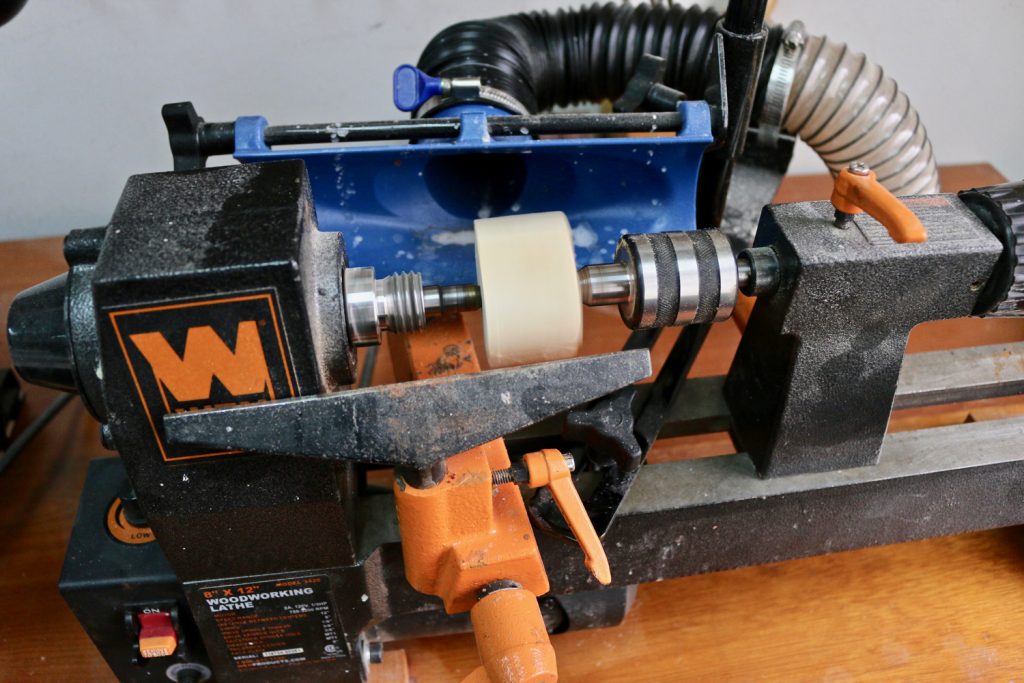
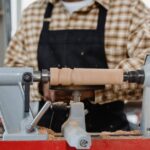
I then turned the scraps between centers on my small WEN lathe. Pine is so soft, I had to be careful not to take off too much too quickly. Using a gauge, I turned both endcaps to equal widths.
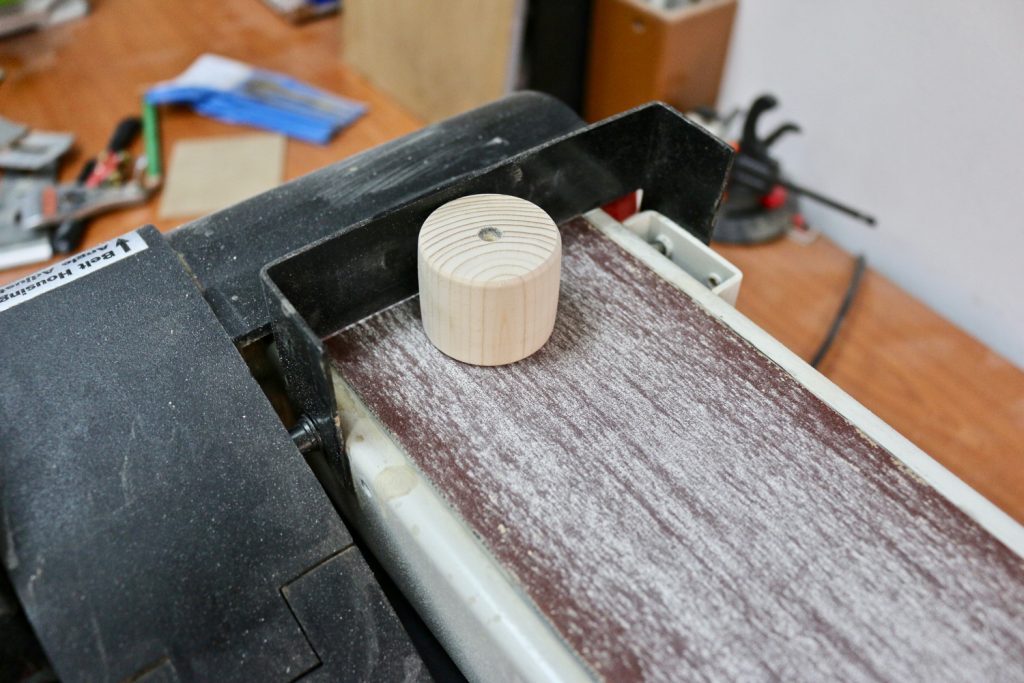
A little sanding on my belt sander to smooth both ends. You can also do this with a file or sandpaper. I decided I could add a bit of flair to the end-caps, so I chucked it on my wood lathe again and added some details.
Don’t have a lathe?
The thing is, the end-caps do not need to be round. You can use two square pieces of wood, and round off the corners with a hand plane or a belt sander. In some ways, a rounded square end-cap looks better than a round end-cap.
Do not make your end-caps too thin or too small. The end-caps add momentum to your swing, and a heavier end-cap will help you open and close the vise much faster.
End-caps For Your Wooden Vise Handle
I’ve seen some videos of people gluing the endcaps with wood glue or CA glue, but I prefer a non-permanent solution. So I decided to use two screws instead.
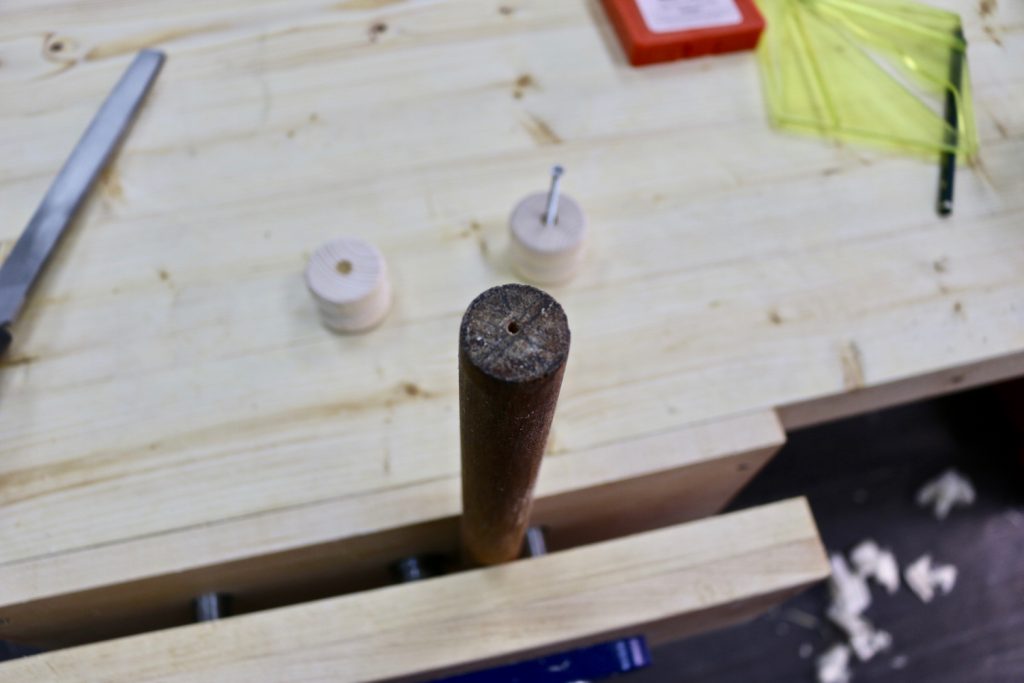
I marked the center of the Meranti dowel, and drilled a 3mm hole on both sides. If you do not pre-drill a hole, you risk cracking or splitting the dowel when you drive a screw in.
Then, I attached the endcaps with a screw, and applied some boiled linseed oil.
I was very happy with the way this turned out. The handle worked perfectly. A longer handle makes it easier for you to turn quickly, as gravity helps along. As you swing the handle, you also create momentum that drives the screw faster.
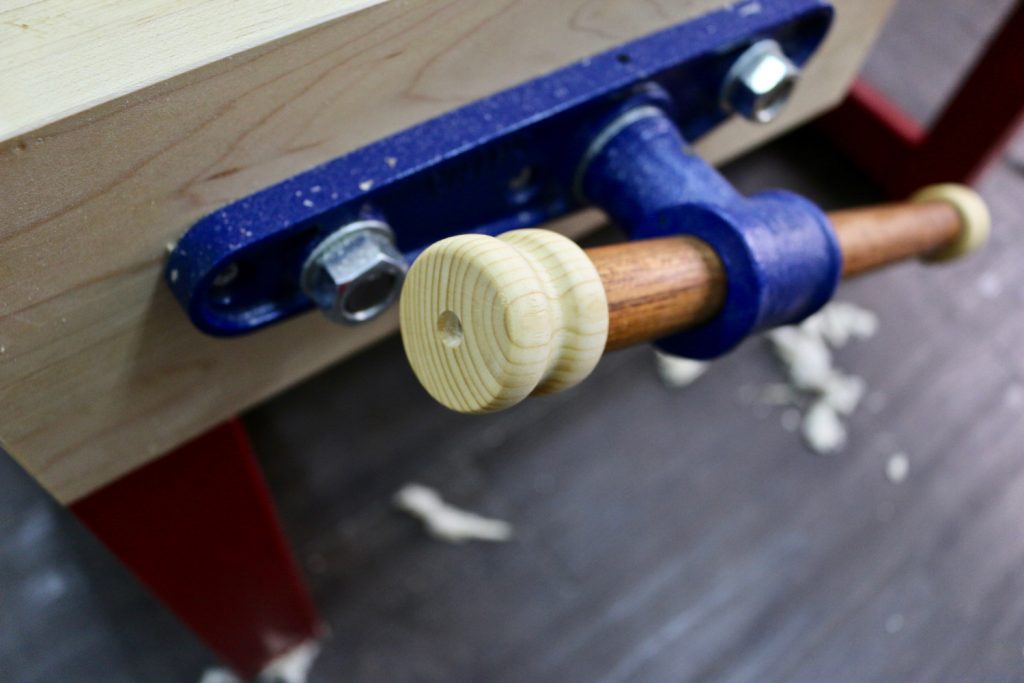
Although I made the ends from Pine offcuts, they look awesome with a light coat of boiled linseed oil. I only sanded to 240 grit on the lathe before applying BLO.
I’m pretty happy with the wooden vise handle I made. The best part is that I spent absolutely no money on it. If you’re looking for a good woodworking vise, I recommend the same one I have, which is the Yost 10″ front vise. I have a step-by-step guide to installing the Yost vise that is very helpful.
If you’re building a smaller workbench, or you want something easier to start with, take a look at the 6.5″ Irwin woodworking vise that I use on my home workbench.